Clone or Copy a virtual machine in VMware vSphere Hypervisor ESX/ESXi 4.x or ESXi 5.0
- 1
CONNECT TO THE VMWARE VSPHERE HYPERVISOR SERVER
Using the VMware vSphere Client, login and connect to the ESX/ESXi server, using the IP address or hostname of the ESX/ESXi server, using the root username and password credentials. If you have a VMware vSphere vCenter server, you could also specify IP address or hostname of the vCenter server which manages your ESX/ESXi servers.
VMware-vSphere-Client3.jpg


- 2 Select and browse the datastore
Once connected to the server, the VMware vSphere Client will display the following inventory of the VMware vSphere ESX/ESXi server.
vSphere-Client-Connection.jpg


The datastore properties are shown on the right hand side
datastore-properties.jpg


Select the datastore, if you've not rename the datastore, the datastore default name isdatastore1.
Right Click the datastore datastore1 and select Browse datastore. All VMware virtual machine files are stored in the datastore.
Browse-Datastore.jpg


- 3. Select the correct virtual machine folder
The Datastore Browser will open and show the contents of the datastore. The virtual machines are stored in folders.
Datastore-Browser.jpg


Double click the virtual machine folder you need to clone or copy.
- 4. Create a destination virtual machine folder for the virtual machine clone or copy
Select the root (/) of the datastore, and click the New Folder icon to create a new destination folder for the new virtual machine clon or copy..
Create-folder.jpg


Enter a name for the folder name followed by OK.
Create-folder1.jpg


The folder will be created in the root of the datastore
Folder-Created.jpg


- 5. Select and Copy Virtual Machine files
Before you can CLONE/COPY the virtual machine files the Virtual Machine needs to be POWERED-OFF.
Double click the virtual machine folder you need to clone/copy.
vm-folder.jpg


Select ALL the files in the VM folder to be cloned/copied.
Select-all-VM-files.jpg


Once all the files have been selected, Right Click and Select Copy.
Select-Copy.jpg


Select and open the folder created in Step 4.
Folder-Created.jpg
the folder will be empty
Empty-Folder.jpg


Right click the empty folder space and Right Click and Select Paste
Paste-to-folder.jpg


The Copy Progress bar will be displayed, indicating a time to completion.
Copy-Progress.jpg


Contents of the new folder, with the cloned/copied virtual machine files.
VM-Copied.jpg


- 6. Register the cloned/copied virtual machine with the Inventory
Select and Right Click the virtual machine VMX file.
Add-to-Inventory.jpg


Follow the Add to Inventory Wizard, make sure the name is different and unique, it must be different to the original virtual machine name. This is just a friendly name for the inventory, it does not change the name of the name of the virtual machine OS.
Enter a Inventory Name followed by Next
Add-to-Inventory-Wizard1.jpg


Select the host, that you want to add this virtual machine to, followed by Next
Add-to-Inventory-Wizard2.jpg


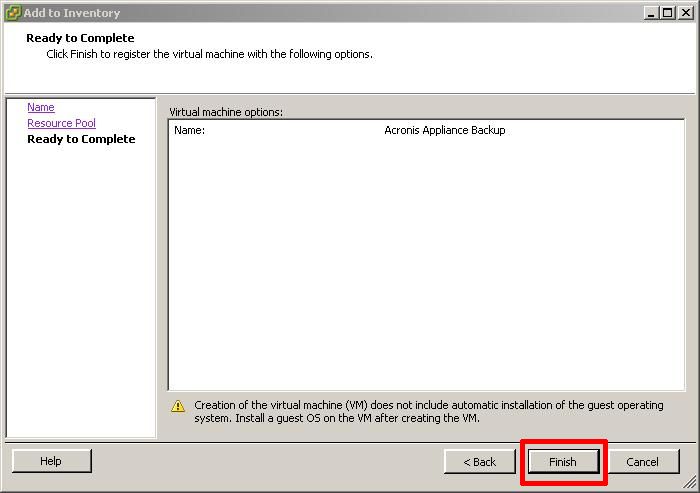
Review the details and Click Finish to add the VM to the Host Machines Inventory. The Virtual Machine will be added to the inventory.
Add-to-Inventory-Wizard3.jpg

You have successfully cloned or copied a virtual machine.
vSphere-Client-Inventory.jpg


沒有留言:
張貼留言